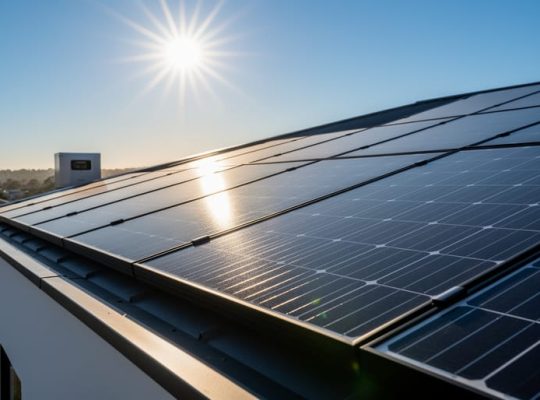
Diagnose solar system malfunctions systematically by first checking inverter display codes and monitoring data to identify performance drops. Conduct thorough visual inspections of panels, wiring, and mounting equipment during daylight hours, documenting any physical damage or debris accumulation. Test electrical connections and junction boxes using appropriate safety equipment, measuring voltage outputs against baseline specifications. Understanding these common solar panel issues enables efficient troubleshooting and minimizes system downtime.
Solar system performance optimization requires precise diagnostic approaches, from analyzing monitoring data to conducting hands-on inspections. Professional troubleshooting not only resolves immediate issues but also prevents potential system failures through early detection. This comprehensive guide provides systematic methods for identifying, diagnosing, and resolving solar PV system complications, ensuring optimal energy production and system longevity.
When approaching solar system maintenance, safety remains paramount. Always verify system shutdown procedures, use appropriate personal protective equipment, and maintain detailed documentation of all diagnostic steps and findings. This methodical approach enables accurate problem identification while maintaining system integrity and operator safety.
Essential Safety Precautions Before Troubleshooting
Before initiating any troubleshooting procedures on solar photovoltaic systems, adherence to strict safety protocols is paramount. Solar installations involve both high voltage DC and AC circuits, which present significant electrical hazards if not handled properly.
First, ensure you have the appropriate Personal Protective Equipment (PPE). This includes insulated gloves rated for the system’s voltage, safety glasses with side shields, non-conductive hard hat, and arc-rated clothing. All tools must be properly insulated and rated for electrical work.
Verify that you possess updated system documentation, including wiring diagrams, component specifications, and emergency shutdown procedures. This documentation is essential for safe and effective troubleshooting.
Weather conditions must be evaluated before beginning work. Avoid troubleshooting during wet conditions, high winds, or severe weather events. Solar panels can be slippery when wet, and lightning poses additional risks during storms.
Implementation of proper lockout/tagout procedures is crucial. This involves:
– Shutting down the system following manufacturer-specified procedures
– Disconnecting all power sources, including the main AC disconnect
– Isolating the DC circuits using the appropriate disconnects
– Verifying absence of voltage using a properly calibrated multimeter
– Applying lockout devices and warning tags to prevent accidental energization
Allow sufficient time for capacitors to discharge after system shutdown. Most modern inverters have internal discharge circuits, but waiting 5-10 minutes is recommended as a safety precaution.
When working on rooftop installations, proper fall protection equipment must be used. This includes OSHA-approved harnesses, anchors, and lifelines. Ensure all access points are secure and maintain clear pathways for emergency egress.
Never work alone on solar systems. A qualified assistant should be present to monitor safety conditions and provide immediate assistance if needed. Both parties should be trained in first aid and familiar with emergency response procedures.
Systematic Diagnosis of Solar PV Performance Issues
Visual Inspection Techniques
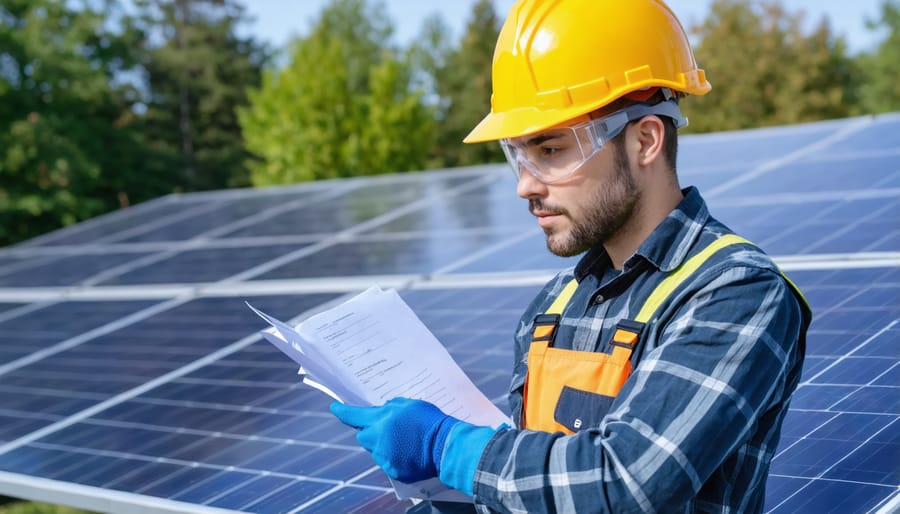
Visual inspection serves as the foundation of effective solar system troubleshooting, offering valuable insights into system performance issues. Begin by examining the solar panels for physical damage, including cracks, discoloration, or delamination. Pay particular attention to the surface cleanliness, as accumulated dust, debris, or bird droppings can significantly impact energy production.
Inspect mounting hardware and racking systems for signs of corrosion, loose fasteners, or structural integrity issues. Check all visible electrical connections, ensuring junction boxes are properly sealed and free from water ingress. Look for signs of animal nesting or damage to wiring conduits, which can compromise system operation.
Monitor the inverter display for error codes and verify that indicator lights show normal operation. Examine the inverter housing for adequate ventilation and signs of overheating. Document any physical abnormalities using photographs and detailed notes, as these records prove invaluable for tracking system degradation over time.
For ground-mounted systems, assess the surrounding vegetation to prevent potential shading issues. Roof-mounted installations require careful inspection of flashing and weatherproofing elements to maintain structural integrity and prevent water infiltration.
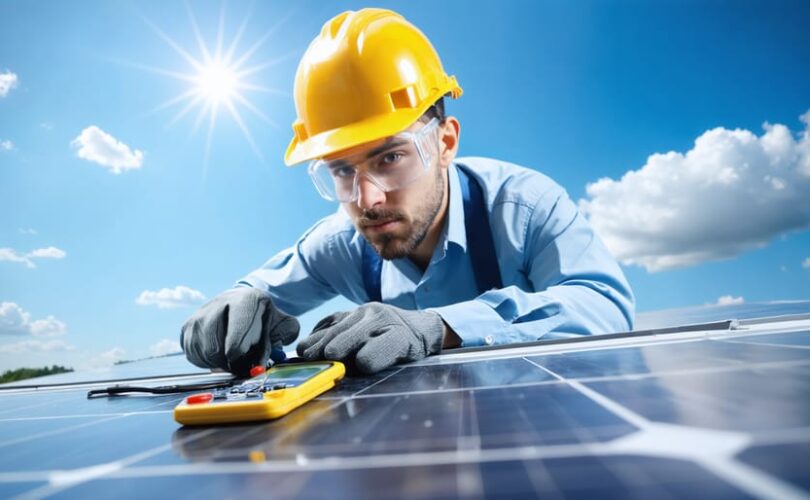
Electrical Testing Procedures
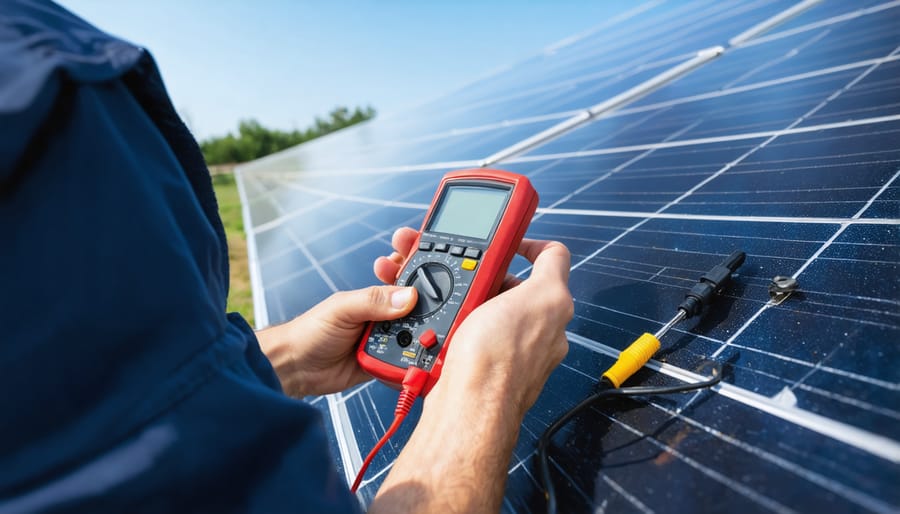
Proper electrical testing is essential for accurate solar system diagnosis. Begin by using a digital multimeter to measure voltage across different system components. For string inverter systems, measure DC voltage at the array terminals and compare it to the expected voltage based on module specifications and configuration. Test AC output voltage at the inverter terminals to ensure it matches grid requirements.
Current measurements require an ammeter or clamp meter. Measure DC current at individual strings to identify underperforming arrays. For AC current, measure at the inverter output to verify proper power production. Compare these values against system specifications and weather conditions to determine if output is within acceptable ranges.
Resistance testing helps identify connection issues and ground faults. Use the multimeter’s ohmmeter function to check continuity between components and measure insulation resistance. Pay special attention to cable connections, junction boxes, and grounding points. High resistance readings often indicate loose connections or corrosion.
When testing, follow this sequence:
– Verify proper meter settings and calibration
– Ensure safe working conditions and wear appropriate PPE
– Test voltage first, followed by current measurements
– Document all readings for comparison with baseline values
– Check multiple points to isolate problem areas
– Verify readings under different operating conditions
Remember that voltage and current measurements should be taken during peak sun hours for meaningful results. Always compare measurements with system documentation and manufacturer specifications to identify deviations from expected values. Record all test results systematically for future reference and trend analysis.
Common Solar System Faults and Solutions
Inverter-Related Issues
Inverter malfunctions can significantly impact solar system performance and require systematic diagnosis. Common indicators of inverter issues include error codes on the display panel, inconsistent power output, or complete system shutdown. When troubleshooting inverter-related problems, first verify the AC and DC disconnect switches are properly positioned and check for any blown fuses or tripped circuit breakers.
Monitor the inverter’s LED indicators or display screen for specific error codes, which typically correspond to documented issues in the manufacturer’s manual. Common problems include grid voltage variations, isolation faults, and communication errors. If the inverter displays overheating warnings, ensure proper ventilation around the unit and clean any dust accumulation from cooling fins.
For string inverters, verify DC input voltage falls within the manufacturer’s specified range. Low voltage conditions often result from panel shading or connection issues, while excessive voltage may occur during cold weather. Check all DC connections for proper torque and signs of corrosion, as loose or degraded connections can cause intermittent operation.
If the inverter fails to start in the morning or shuts down unexpectedly, examine the AC grid connection quality. Voltage or frequency variations from the utility grid can trigger protective shutdowns. Document all error codes, operating conditions, and troubleshooting steps taken, as this information is valuable for warranty claims or professional service requests.

Panel Performance Problems
Solar panels can experience various panel performance issues that significantly impact system efficiency. Common problems include physical damage from extreme weather, degradation of photovoltaic cells, and accumulation of debris. Microcracks, often invisible to the naked eye, can develop due to thermal stress or mechanical impact, reducing power output by up to 20%.
Delamination, where the protective layers separate from the solar cells, presents another serious concern. This condition typically occurs due to manufacturing defects or prolonged exposure to harsh environmental conditions. When identified early, some delamination cases can be remediated through professional repair services.
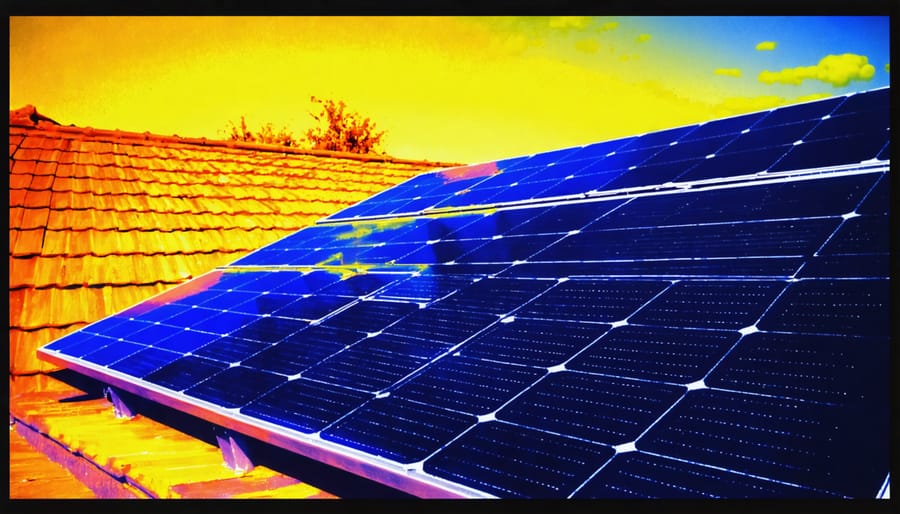
Hot spots, characterized by localized overheating, indicate cell mismatch or partial shading issues. These areas can be detected through thermal imaging and require prompt attention to prevent permanent damage. Regular inspection using calibrated thermal cameras can help identify these problems before they escalate.
Performance degradation may also result from potential induced degradation (PID), particularly in systems with higher voltage configurations. PID occurs when voltage potential between the solar cells and frame causes electron migration, leading to reduced power output. Implementation of anti-PID technologies and proper grounding can mitigate this issue.
Addressing these challenges requires systematic evaluation using specialized diagnostic tools and professional expertise. Regular maintenance inspections can help identify and resolve issues before they significantly impact system performance.
Wiring and Connection Failures
Electrical connection issues represent a significant portion of solar system malfunctions. Common wiring problems include loose connections, corroded terminals, damaged insulation, and improper grounding. These issues can manifest as reduced system performance, intermittent power output, or complete system shutdown.
To identify wiring failures, begin with a visual inspection of all connection points, including junction boxes, combiner boxes, and inverter terminals. Look for signs of physical damage, discoloration, or thermal stress. Pay particular attention to MC4 connectors, which can deteriorate over time due to environmental exposure.
Use a multimeter to test voltage and continuity across suspicious connections. Voltage drops across connections should be minimal; higher readings indicate resistance problems. For string inverter systems, measure individual string voltages to identify potential wiring issues within specific arrays.
Common remediation steps include:
– Cleaning corroded terminals with appropriate electrical contact cleaner
– Re-torquing loose connections to manufacturer specifications
– Replacing damaged cables or connectors
– Verifying proper wire gauge and ampacity ratings
– Ensuring weatherproof sealing of outdoor connections
Documentation of all discovered issues and repairs is essential for maintaining system reliability. Regular preventive maintenance inspections can help identify potential wiring problems before they cause system failure. When working with high-voltage DC circuits, always follow proper safety protocols and consider consulting certified professionals for complex repairs.
Advanced Diagnostic Tools and Techniques
Professional solar system diagnostics require sophisticated equipment and methodologies to accurately identify and resolve performance issues. Modern diagnostic monitoring tools combine hardware and software solutions to provide comprehensive system analysis.
I-V curve tracers are essential instruments that measure current-voltage characteristics of solar modules, helping technicians identify issues like partial shading, cell degradation, or manufacturing defects. These devices can test individual panels or entire strings, providing detailed performance data for analysis.
Infrared thermal imaging cameras detect hot spots and temperature anomalies that may indicate cell damage, connection problems, or bypass diode failures. These cameras create detailed thermal maps of solar arrays, allowing technicians to pinpoint exact locations of malfunctioning components without physical contact.
Data logging equipment captures and records system performance metrics over time, including voltage, current, power output, and environmental conditions. This historical data enables trend analysis and helps identify gradual degradation patterns that might otherwise go unnoticed.
Power quality analyzers measure electrical parameters such as harmonics, power factor, and voltage fluctuations. These measurements are crucial for identifying grid interaction issues and ensuring compliance with utility requirements.
Advanced monitoring systems incorporate remote sensing capabilities and real-time analytics. These systems use sophisticated algorithms to compare actual performance against expected values, generating automated alerts when discrepancies occur.
Multifunction installation testers verify proper system installation and safety parameters. They measure insulation resistance, ground continuity, and other critical safety metrics required by regulatory standards.
String analyzers evaluate the performance of multiple panel strings simultaneously, helping identify mismatched or underperforming modules within an array. This capability is particularly valuable for large-scale installations where manual testing would be impractical.
When using these tools, technicians must follow standardized testing procedures and maintain proper calibration to ensure accurate results. Regular equipment maintenance and operator training are essential for reliable diagnostics.
Documentation of test results using digital platforms enables systematic tracking of system health and facilitates data-driven maintenance decisions. This approach helps optimize system performance while minimizing downtime and repair costs.
Preventive Maintenance Strategies
Implementing effective preventive maintenance strategies is crucial for maximizing the longevity and efficiency of solar photovoltaic systems. A well-structured maintenance program incorporates regular inspections, performance monitoring, and timely interventions to prevent potential system failures.
Regular visual inspections should be conducted quarterly to identify physical damage, loose connections, or signs of degradation. This includes examining solar panels for microcracks, delamination, or discoloration, checking mounting hardware for corrosion, and inspecting cable connections for signs of wear or exposure to environmental elements.
Performance monitoring through data acquisition systems enables early detection of efficiency losses. Key parameters to monitor include:
– Daily energy production trends
– Inverter efficiency metrics
– String current measurements
– Module temperature variations
– Grid interaction parameters
Following essential maintenance procedures such as panel cleaning should be scheduled based on local environmental conditions. In dusty or high-pollution areas, cleaning may be required monthly, while in cleaner environments, quarterly cleaning might suffice.
Documentation plays a vital role in preventive maintenance. Maintain detailed records of:
– System performance data
– Maintenance activities performed
– Component replacement history
– Warranty information
– Inspection findings
Thermal imaging inspections should be conducted annually to identify hot spots, failed bypass diodes, or other thermal anomalies that could indicate developing problems. This non-invasive technique can reveal issues before they manifest as significant performance losses.
Electrical testing, including insulation resistance measurements and I-V curve analysis, should be performed annually by qualified technicians. These tests can identify degradation in wiring, connections, or module performance that might not be visible during routine inspections.
Vegetation management around the array area must be maintained to prevent shading and ensure proper airflow. This includes trimming trees, controlling weed growth, and maintaining clear access paths for maintenance personnel.
System owners should also establish relationships with qualified service providers and maintain an inventory of critical spare parts to minimize downtime when repairs are needed. Regular training updates for maintenance personnel ensure they stay current with evolving technology and best practices in solar system maintenance.
Effective solar system troubleshooting requires a systematic approach, combining technical knowledge with practical diagnostic skills. Throughout this guide, we’ve explored the essential components of successful PV system maintenance and problem resolution, from fundamental safety protocols to advanced diagnostic techniques.
Regular maintenance and prompt attention to system issues are crucial for maximizing solar installation performance and longevity. By following proper safety procedures, utilizing appropriate diagnostic tools, and implementing systematic troubleshooting methodologies, technicians and system owners can identify and resolve issues efficiently while minimizing system downtime.
The importance of proper documentation cannot be overstated, as it provides valuable historical data for future reference and helps establish patterns in system behavior. Additionally, staying current with industry standards, manufacturer guidelines, and technological advances ensures troubleshooting practices remain effective and up-to-date.
Remember that while some issues can be resolved through basic troubleshooting, complex problems require professional intervention. Maintaining a collaborative relationship with qualified solar professionals and keeping comprehensive maintenance records will contribute significantly to system reliability and performance optimization.
By implementing the strategies and best practices outlined in this guide, stakeholders can ensure their solar PV systems operate at peak efficiency, delivering maximum return on investment while contributing to sustainable energy production. Continuous learning and adherence to safety protocols remain paramount in successful solar system maintenance and troubleshooting.