Mastering photovoltaic installation demands more than theoretical knowledge – it requires hands-on expertise gained through intensive practical training. Our comprehensive expert PV installation training workshops transform abstract concepts into tangible skills, enabling participants to confidently handle real-world solar installation challenges. Through carefully structured modules, professionals gain direct experience with industry-standard equipment, safety protocols, and quality control processes. This practical approach, developed in collaboration with leading universities and industry experts, bridges the critical gap between classroom learning and field implementation, preparing participants for immediate success in the renewable energy sector. Each hands-on session integrates current best practices with emerging technologies, ensuring graduates possess the latest skills demanded by the rapidly evolving solar industry.
Essential Safety Protocols and Equipment
Personal Protective Equipment (PPE)
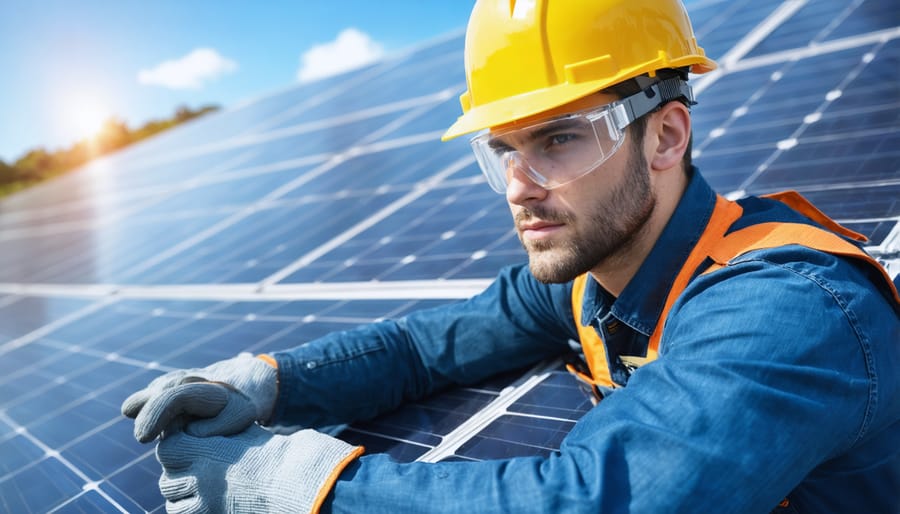
Proper personal protective equipment is essential for ensuring participant safety during hands-on photovoltaic installation projects. Following established safety training practices, all participants must wear ANSI-approved hard hats, safety glasses with side shields, and non-conductive safety gloves rated for electrical work. Steel-toed boots with non-slip soles are mandatory for protection against falling objects and maintaining stable footing on varied surfaces.
For rooftop installations, participants must utilize fall protection equipment, including a full-body harness, lanyard, and appropriate anchor points. When working with electrical components, insulated tools and rubber-soled footwear are required to prevent electrical hazards. Long-sleeved shirts and durable work pants provide protection against sun exposure and minor abrasions.
All PPE must be inspected before use and properly maintained throughout the project. Damaged equipment should be immediately reported and replaced. During hot weather conditions, participants should also wear breathable, moisture-wicking materials and use appropriate sun protection, including UV-resistant clothing and sunscreen.
Site Safety Assessment
A thorough site safety assessment is essential before initiating any photovoltaic installation project. Begin by evaluating the structural integrity of the installation surface, particularly roof conditions, load-bearing capacity, and existing weatherproofing systems. Inspect the surrounding area for potential electrical hazards, including overhead power lines and existing electrical infrastructure.
Document all access points, working heights, and potential fall hazards to determine appropriate safety equipment requirements. Assess environmental factors such as wind exposure, shade patterns, and local weather conditions that could impact both installation safety and system performance. Identify locations for emergency equipment, first aid stations, and assembly points.
Create a detailed hazard identification checklist covering electrical, mechanical, and environmental risks. Consider site-specific challenges like confined spaces, extreme temperatures, or challenging terrain. Evaluate the need for specialized equipment or additional safety measures based on unique site characteristics.
Ensure compliance with local building codes and safety regulations, documenting all findings in a comprehensive site assessment report. This evaluation serves as the foundation for developing appropriate safety protocols and determining necessary personal protective equipment for the installation team.
Hands-On Installation Components
Mounting System Assembly
Begin by verifying the mounting location and ensuring all necessary components are present. Lay out the roof attachments according to your engineering drawings, maintaining proper spacing and alignment. Install flashing at each mounting point to prevent water infiltration, carefully lifting shingles and securing flashings with appropriate fasteners.
Attach the L-feet or mounting brackets to the roof attachments, ensuring proper torque specifications are met. Use a calibrated torque wrench to prevent over-tightening, which could compromise the mounting system’s integrity. Install the rails perpendicular to the rafters, maintaining level alignment using a laser level or string line.
Secure rail splices at connection points, ensuring proper expansion gaps for thermal movement. Install end clamps and mid clamps at specified intervals, confirming they align with the solar panel mounting zones. Check all connections for proper torque values and structural integrity.
Add any required grounding equipment according to local electrical codes. Install wire management solutions, such as cable clips or raceways, beneath the rails to organize and protect electrical connections. Verify that all components are properly aligned and secured before proceeding with panel installation.
Document all torque values and mounting locations for quality control purposes. Perform a final inspection of the mounting system, checking for proper spacing, alignment, and structural integrity before proceeding to the next phase of installation.

Panel Placement and Securing
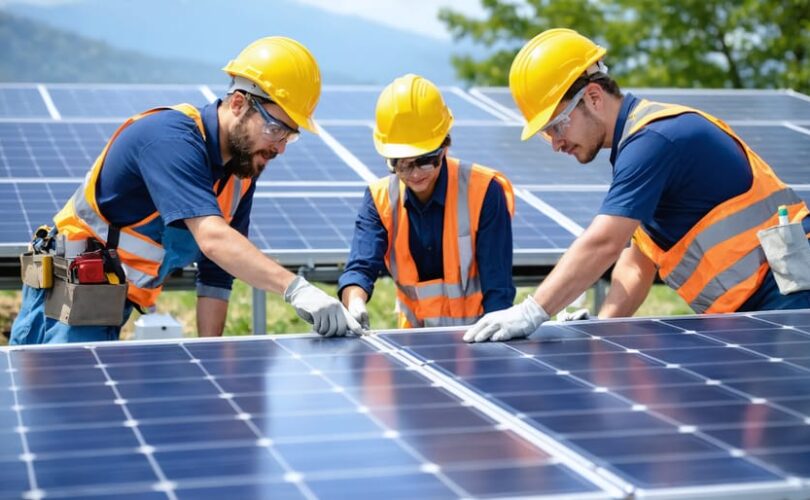
Proper panel placement is crucial for maximizing solar energy generation and ensuring system longevity. After selecting quality solar panels, precise positioning becomes the next critical step. Begin by marking mounting points according to your installation plan, ensuring they align with the roof’s structural support beams. Use chalk lines to create accurate grid patterns that will guide panel placement.
Secure mounting rails with appropriate fasteners, maintaining proper torque specifications to prevent future loosening. When positioning panels, maintain consistent spacing between units to allow for thermal expansion and facilitate airflow. Standard gap measurements typically range from 1-2 cm between panels, though specific requirements may vary by manufacturer.
Install panels sequentially, starting from the bottom row and working upward. This approach provides a stable platform for subsequent installations and helps maintain proper alignment throughout the array. Secure each panel using the manufacturer-recommended mounting clamps – typically a combination of mid and end clamps. Pay special attention to edge panels, which may require additional securing methods to withstand higher wind loads.
Verify that all panels are level using a digital inclinometer, and double-check that mounting hardware is properly tightened to specified torque values. Document all installation measurements and mounting points for future reference and maintenance purposes.
Electrical Connections
Proper electrical connections are critical for the safety and efficiency of photovoltaic systems. Begin by identifying the positive and negative terminals on both the solar panels and the charge controller. Use appropriately sized cables based on the system’s voltage and current requirements, ensuring they meet local electrical codes and standards.
When stripping cables, remove precisely the right amount of insulation to prevent exposed conductors while maintaining solid contact. Utilize proper crimping tools for terminal connections, applying the correct pressure to create secure, low-resistance joints. For MC4 connectors commonly used in solar installations, ensure they click firmly into place and verify the connection is weathertight.
Series connections require linking the positive terminal of one panel to the negative terminal of the next, while parallel connections join all positive terminals together and all negative terminals together. Double-check polarity before making final connections to prevent potential system damage.
Install junction boxes in accessible locations, using appropriate cable glands to maintain environmental protection. Apply anti-oxidation compound to exposed copper connections to prevent corrosion. Secure all cables with UV-resistant zip ties or cable clips, maintaining proper bend radius and avoiding sharp edges.
After completing connections, perform continuity testing with a multimeter to verify proper circuit completion. Document all connection points in the system diagram for future reference and maintenance purposes.
Quality Control and Testing
Installation Verification
After completing the installation, follow this systematic verification process to ensure all components are properly installed and functioning. Begin by conducting a visual inspection of all mounting hardware, checking that all bolts and fasteners are securely tightened to their specified torque values. Verify that all modules are aligned correctly and that there are no gaps between panels that could compromise system integrity.
Perform a detailed electrical verification by testing the following:
– Open circuit voltage (Voc) measurements for each string
– Short circuit current (Isc) readings under suitable irradiance conditions
– Proper polarity of all DC connections
– Grounding continuity throughout the system
– Inverter communication and startup sequence
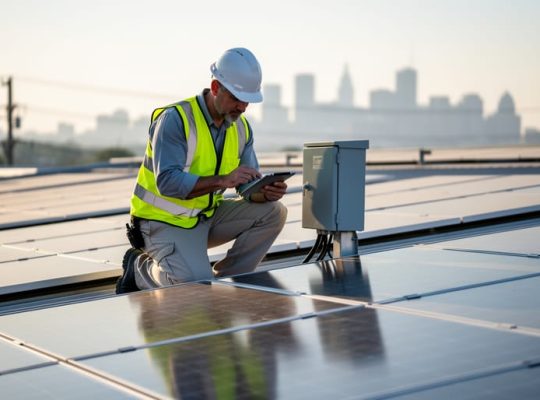
Document all readings in the installation verification checklist, comparing them against manufacturer specifications. Check that all labels and safety signage are properly placed and clearly visible. Verify that the monitoring system is operational and accurately reporting system performance data.
Complete a thorough inspection of the roof penetrations and flashing, ensuring proper weatherproofing. Test all emergency shutdown mechanisms and verify they function as designed. Finally, take detailed photographs of the completed installation, including close-ups of electrical connections and mounting points, for documentation purposes.
Once all verifications are complete, conduct a final walkthrough with the quality control supervisor before system commissioning.
System Performance Testing
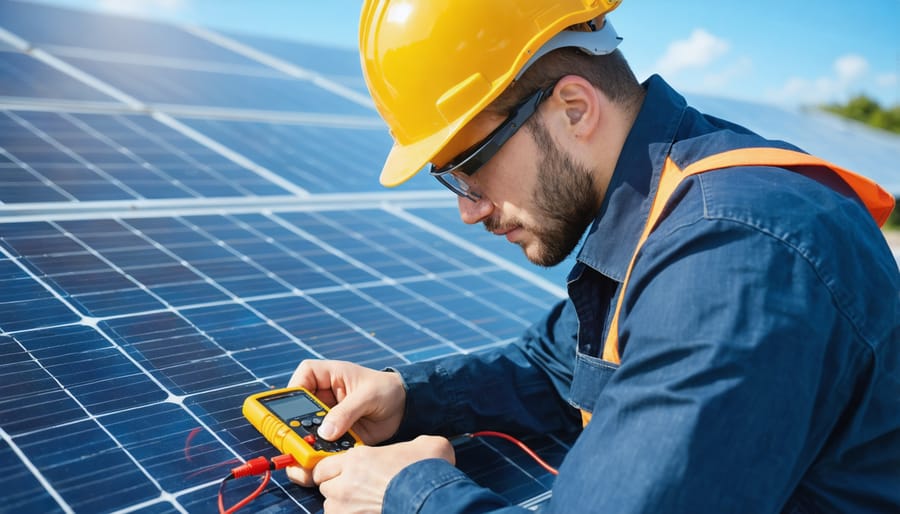
System performance testing is a critical phase that validates the proper functioning of the installed photovoltaic system. Begin by conducting a comprehensive visual inspection to ensure all components are correctly mounted and connected according to specifications. Verify the polarity of all electrical connections and check for proper cable management.
Perform voltage and current measurements at key points throughout the system using calibrated multimeters. Test open-circuit voltage (Voc) and short-circuit current (Isc) for each string of panels under stable irradiance conditions. Document these readings and compare them against expected values from manufacturer specifications.
Utilize modern monitoring equipment for detailed PV performance analysis to evaluate system efficiency and identify potential issues. Monitor inverter operation, checking for proper startup sequence and grid synchronization. Verify that the system’s safety features, including ground fault protection and rapid shutdown capabilities, are functioning as designed.
Test the system’s performance ratio under various conditions, including different times of day and weather patterns. Record and analyze data from the monitoring system to establish baseline performance metrics. Finally, conduct a thorough commissioning test to confirm compliance with local utility requirements and relevant safety standards before system handover.
Troubleshooting Common Issues
During hands-on photovoltaic installation projects, several common challenges may arise. Being prepared to address these issues efficiently ensures project success and maintains educational value. Here are key troubleshooting solutions for frequently encountered problems:
Equipment misalignment often occurs during initial mounting stages. When roof brackets appear uneven, double-check measurements and use laser leveling tools to ensure precise alignment before proceeding with rail installation. If discrepancies persist, adjust the mounting hardware and verify the roof’s structural integrity.
Wiring connection issues can manifest as voltage inconsistencies or system underperformance. Always test connections with a multimeter before finalizing installations. Should readings indicate problems, inspect wire terminals for proper crimping, verify polarity, and ensure weather-tight seals are correctly applied to junction boxes.
Module compatibility challenges may arise when integrating different components. Verify voltage and current specifications match across all system elements. If incompatibilities are detected, consult manufacturer documentation and potentially adjust string configurations to optimize system performance.
Inverter configuration errors frequently surface during system startup. When encountering initialization failures, systematically verify input parameters, check firmware versions, and ensure proper grounding. Document any error codes and consult manufacturer support for specific troubleshooting protocols.
Weather-related complications can impact installation timing and quality. Maintain flexible scheduling and have contingency plans for protecting equipment and work areas. Use appropriate sealants and weather-resistant materials, ensuring proper cure times in various environmental conditions.
Physical obstacles like vent pipes or chimneys may require layout modifications. Develop alternative array configurations while maintaining optimal system performance. Consider microinverter or power optimizer solutions when partial shading is unavoidable.
Remember that proper documentation of troubleshooting steps and solutions contributes to future learning opportunities and system maintenance efficiency. Encourage participants to maintain detailed notes of challenges encountered and resolution methods applied.
This hands-on workshop experience marks a significant milestone in your journey toward becoming a proficient photovoltaic installation professional. Through practical exercises and real-world applications, participants have gained essential skills in system design, installation techniques, and safety protocols. The comprehensive training provided has equipped you with the knowledge to handle various installation scenarios and troubleshoot common challenges effectively.
Moving forward, we encourage participants to leverage their newly acquired expertise by seeking apprenticeship opportunities or entry-level positions with established solar installation companies. The certification earned through this workshop serves as a valuable credential, demonstrating your practical competency to potential employers. Additionally, consider joining professional organizations and attending industry conferences to stay current with evolving technologies and best practices.
To maintain momentum in your professional development, we recommend documenting your hands-on experience, creating a portfolio of completed projects, and pursuing advanced certifications. The connections made during this workshop with fellow participants and industry experts can become valuable networking resources throughout your career. Remember that sustainable energy implementation requires continuous learning and adaptation to new technologies and installation methods.
For those interested in further specialization, our advanced workshops focus on specific aspects of PV installation, including commercial systems, advanced monitoring solutions, and integrated storage systems. Your participation in this foundational workshop has established a solid base for these advanced learning opportunities.