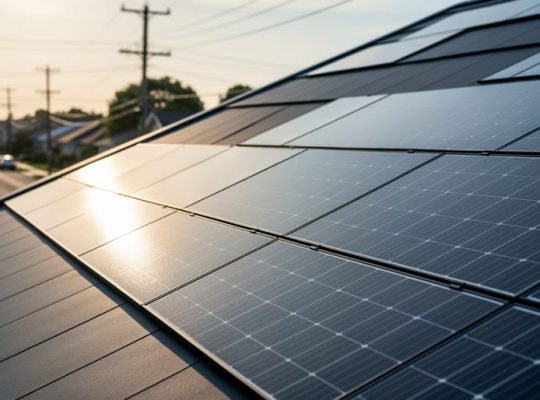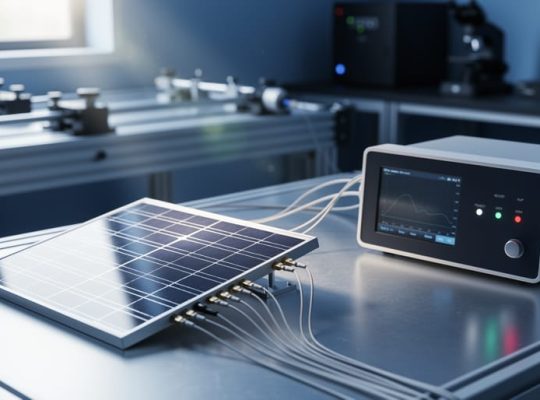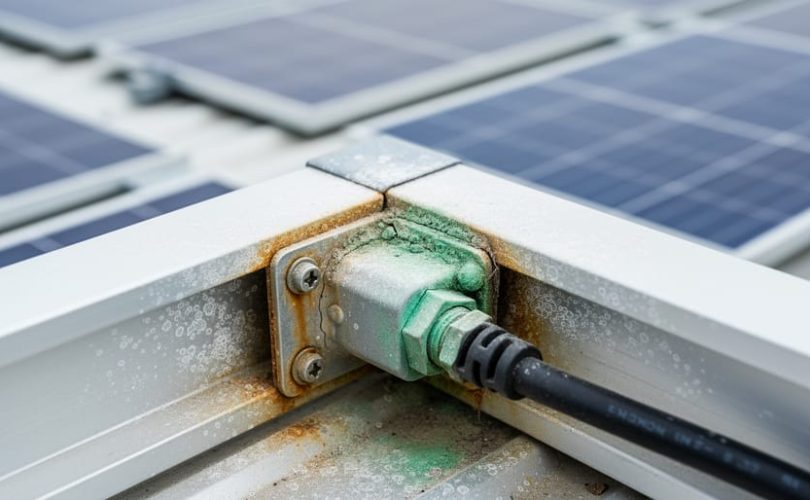
Most corrosion on solar panels starts with microcracking in the aluminum frame or degradation of the junction box seals, often unnoticed until efficiency drops by 5 to 10 percent. If you’ve spotted white powdery deposits along the frame edges, rust-colored stains near mounting hardware, or green oxidation around electrical connections, you’re dealing with corrosion that demands immediate attention to protect your system’s solar panel lifespan.
The quickest diagnostic check: inspect the junction box and frame-to-rail contact points for visible oxidation or moisture intrusion. If corrosion has reached the bus bars or cell interconnects beneath the glass, or if you observe delamination around the perimeter seal, shut down the system and consult a certified PV technician before proceeding. Electrical corrosion poses serious shock and fire risks that exceed the scope of DIY repair.
For surface-level frame corrosion and minor hardware oxidation, this guide walks you through identifying the damage type, understanding the environmental and installation factors that caused it, and implementing proven repair protocols used by maintenance crews across utility-scale installations. We draw on field data from our collaborations with university research programs studying long-term module degradation, providing you with prevention strategies grounded in both materials science and real-world performance tracking. Whether you’re managing a residential rooftop array or pursuing professional certification through our educational programs, the troubleshooting framework here equips you to diagnose corrosion accurately, address fixable issues safely, and implement protocols that prevent recurrence in humid, coastal, or industrial environments.
Recognizing Solar Panel Corrosion: Key Symptoms
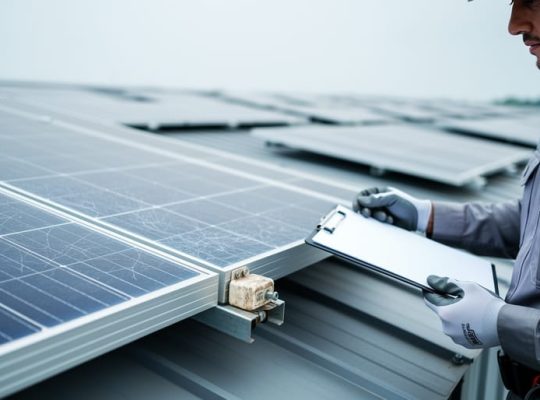
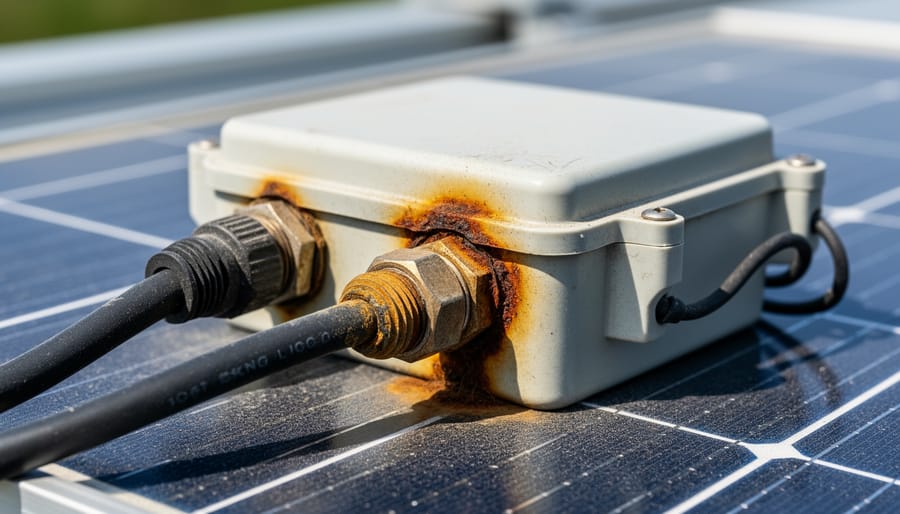
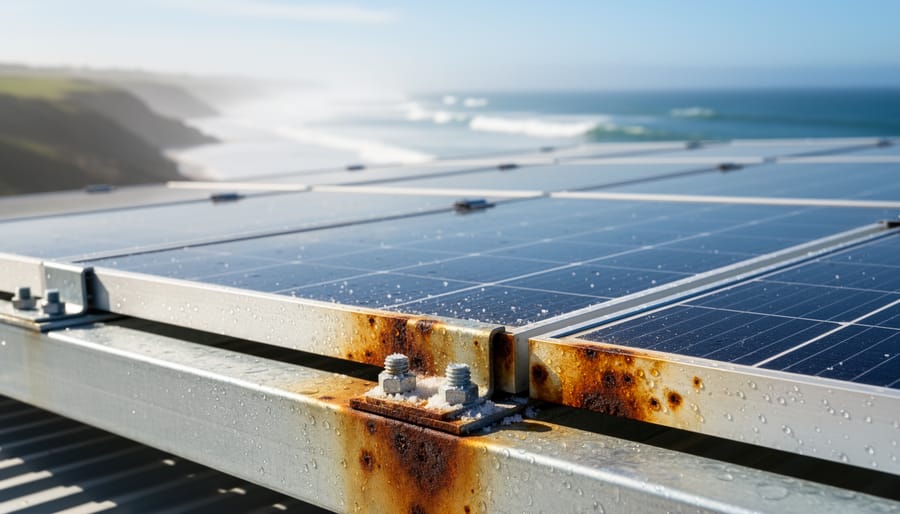
Spotting corrosion early can save thousands in repair costs and prevent permanent damage to your solar investment. Visual inspection reveals several telltale signs: look for white, green, or brown discoloration on aluminum frames, particularly at joints and mounting points where moisture collects. The panel’s junction box, often mounted on the rear, may show rust stains, cracked housings, or corroded electrical terminals where cables enter. Frame edges might develop pitting or a powdery white residue, especially in coastal installations exposed to salt spray.
Performance symptoms often appear before visible damage becomes severe. Monitor your system’s output data for gradual power decline that exceeds normal degradation rates (typically 0.5-0.8% annually). Hot spots detected during infrared scanning frequently indicate internal corrosion disrupting electrical connections. Intermittent faults, tripped breakers, or ground fault alarms suggest corrosion has compromised insulation or created unintended current paths.
During routine inspections, systematically check these corrosion indicators:
- Discoloration or deposits on frames, mounting hardware, and electrical enclosures
- Cracking, delamination, or bubbling along panel edges where moisture penetrates
- Rust or verdigris on junction boxes, cable glands, and terminal connections
- Loose or degraded mounting clamps and grounding hardware
- Accelerated output loss beyond manufacturer specifications
- Thermal anomalies indicating localized resistance from corroded connections
String-level monitoring can isolate affected panels before corrosion spreads. If you notice multiple symptoms appearing simultaneously, immediate troubleshooting quick fixes may prevent escalation to component failure. Document findings with photos and output data to track progression, this baseline proves invaluable when deciding between repair and replacement. Catching corrosion at the surface oxidation stage allows for straightforward remediation, whereas advanced internal corrosion often requires panel replacement and addressing the underlying cause to protect surrounding equipment.
What Causes Solar Panel Corrosion?
Environmental and Climate Factors
Environmental conditions are the primary drivers of solar panel corrosion, creating the electrochemical reactions that degrade components over time. Understanding how climate factors accelerate these processes helps explain why identical panels corrode at vastly different rates depending on installation location.
Moisture and humidity create the electrolyte necessary for corrosion reactions. In high-humidity regions or installations with poor drainage, water accumulates in panel frames, junction boxes, and connector housings. Even small amounts of condensation trapped behind glass can initiate corrosion of electrical contacts and bus bars. Coastal installations face particularly aggressive conditions, airborne salt deposits from sea spray form highly conductive surface films that accelerate galvanic corrosion between dissimilar metals by orders of magnitude compared to inland sites.
Temperature cycling compounds moisture-related damage through repeated expansion and contraction. Daily heating and cooling creates micro-cracks in sealants and encapsulant materials, opening pathways for moisture ingress. Extreme temperature swings common in desert climates or high-altitude installations stress material interfaces, causing adhesive failures that expose aluminum frames and steel mounting hardware to direct atmospheric contact.
UV exposure degrades the polymer materials protecting metal components. Prolonged solar radiation breaks down backsheet materials, frame gaskets, and junction box seals, making them brittle and permeable. This photodegradation reduces the protective barrier function of these materials, allowing moisture and contaminants to reach vulnerable metal surfaces beneath.
The combination of these factors creates accelerated corrosion in specific climate zones. Marine environments, tropical high-humidity regions, and high-altitude sites with intense UV all require specialized corrosion protection strategies beyond standard panel construction.
Material and Manufacturing Issues
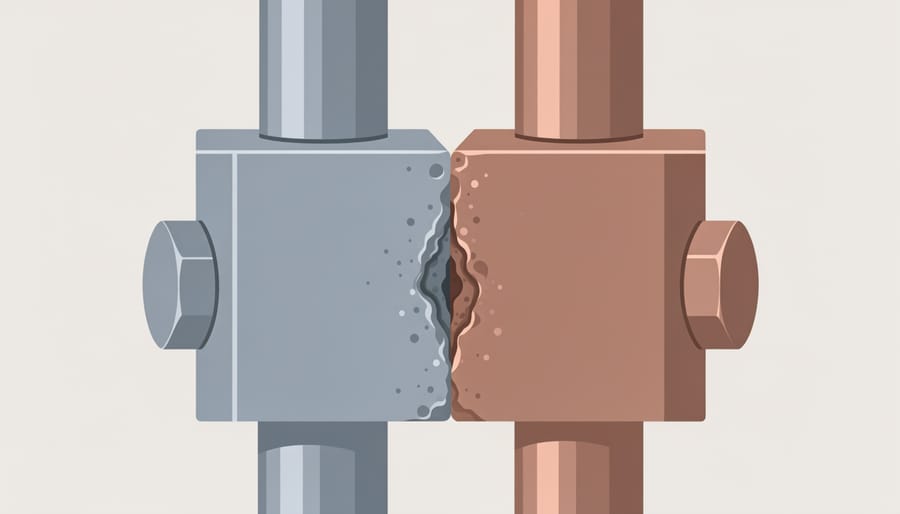
Manufacturing defects and material choices create corrosion pathways that environmental factors then exploit. Galvanic corrosion occurs when dissimilar metals make direct contact in the presence of an electrolyte, typically moisture that penetrates seals. In solar panels, this commonly happens where aluminum frames meet stainless steel mounting hardware, or where copper conductors interface with tinned or silver-plated terminals. The more noble metal (stainless steel, copper) acts as a cathode while the less noble aluminum becomes the anode, accelerating its corrosion through electrochemical action.
Aluminum frames themselves are particularly vulnerable. While anodizing provides protective oxide layers, scratches during shipping, improper handling, or low-quality anodization leave bare aluminum exposed. Coastal installations see accelerated deterioration as chloride ions penetrate these weak points. Some manufacturers use powder coating instead of anodization, but chips in this coating create localized corrosion cells.
Encapsulation failures represent critical manufacturing defects. EVA (ethylene vinyl acetate) or POE (polyolefin elastomer) encapsulants should hermetically seal cells from moisture. Delamination, where encapsulant separates from glass or backsheet, creates pathways for water vapor. Poor edge sealing or backsheet defects allow moisture ingress directly to electrical components. Once inside, water accelerates corrosion of cell metallization, solder bonds, and ribbon conductors.
Junction boxes present another failure point. Low-quality potting compounds crack under thermal cycling, exposing terminals to moisture. Inadequate strain relief causes cable flexing that breaks seals. Cheap terminal materials corrode rapidly, increasing electrical resistance and generating heat that further accelerates degradation. Solder joints made with flux residues attract moisture and initiate corrosion from within. These material and assembly quality issues often only manifest after warranty periods expire, making manufacturer selection and quality verification critical during procurement.
Installation and Maintenance Gaps
Installation errors and neglected maintenance create direct pathways for corrosion that would otherwise never occur. Even high-quality panels will corrode if fundamental installation principles are compromised.
Improper grounding stands as the most consequential mistake. When grounding conductors are undersized, poorly bonded, or connected to dissimilar metals without proper isolation, electrical potential differences drive accelerated galvanic corrosion. Missing or damaged grounding lugs on aluminum frames create localized corrosion points that rapidly expand. Each connection point between the grounding system and panel components must maintain electrical continuity while preventing galvanic couples.
Inadequate sealing at penetration points allows moisture ingress behind encapsulation layers. Installer-drilled holes through frames without proper sealing, insufficient sealant around junction boxes, and gaps where conduit enters electrical enclosures create moisture traps. Water migrates along wire pathways into junction boxes, corroding terminals and bypass diodes from the inside out.
Mounting hardware selection errors introduce corrosion through material incompatibility. Stainless steel bolts threading directly into aluminum rails without isolation washers, zinc-plated hardware in coastal environments, and carbon steel clamps against aluminum frames all establish aggressive galvanic cells. Hardware must match or properly isolate from the frame material.
Neglected preventive maintenance allows minor corrosion to progress unchecked. Debris accumulation traps moisture against frames, loose electrical connections develop resistance and heat that accelerates local corrosion, and surface contamination from bird droppings creates acidic conditions. Regular inspections identify these issues before they compromise structural or electrical integrity.
Step-by-Step Corrosion Remediation
Safety Precautions and System Shutdown
Before attempting any corrosion repair work on your solar PV system, you must prioritize electrical safety. Solar panels generate voltage whenever exposed to light, even on cloudy days, creating a potentially lethal shock hazard.
Start by shutting down the system at the inverter’s AC disconnect, then the DC disconnect near the array. If your system includes a rapid shutdown device, activate it according to manufacturer instructions. Never assume panels are safe to touch simply because disconnects are off; they remain energized by sunlight.
Cover affected panels completely with opaque tarps or blankets to eliminate voltage generation during repair work. Secure coverings so wind cannot dislodge them. Implement lockout/tagout procedures by placing locks on all disconnects and posting warning tags to prevent accidental re-energization by others.
Wear appropriate personal protective equipment: insulated gloves rated for DC voltage (typically 600V minimum), safety glasses, and non-conductive footwear. When working on rooftop installations, use proper fall protection equipment including harnesses and anchor points. Verify zero voltage with a calibrated multimeter before touching any components.
Consider hiring a licensed electrician or certified PV technician if you lack experience with high-voltage DC systems or proper safety equipment.
Inspection and Damage Assessment
Begin your assessment with a visual inspection conducted in dry conditions when panels are cool to the touch. Walk the array methodically, examining each panel front and back. Look for white or green powdery deposits on aluminum frames, rust stains near fasteners, darkened or delaminated areas on the backsheet, and any visible moisture intrusion around junction boxes or frame edges.
Document your findings systematically. Photograph each affected panel from multiple angles, noting its string position and serial number. Use a multimeter to measure open-circuit voltage and compare readings against manufacturer specifications, corroded cells or connections typically show voltage drops of 5-15% below nameplate ratings.
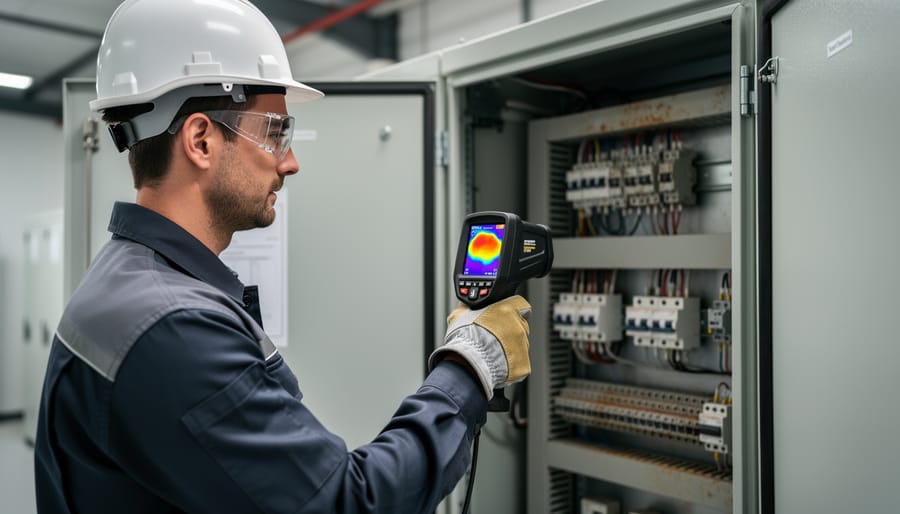
Thermal imaging reveals hidden damage invisible to the naked eye. Conduct scans during peak sun hours when the array is under load. Corroded connections appear as hot spots, typically 10-20°C above surrounding cell temperatures. Junction box corrosion creates distinct thermal signatures at electrical terminations. Map these anomalies to your visual inspection photos.
Check insulation resistance with a megohmmeter. Readings below 40 megohms between conductors and ground suggest moisture has compromised encapsulation integrity. Test each affected panel individually after disconnecting from the string.
Finally, assess repairability. Surface frame oxidation and minor junction box corrosion respond to cleaning and resealing. Backsheet delamination, cell-level corrosion, or insulation resistance failures below 10 megohms generally require panel replacement. When corrosion affects more than 30% of a panel’s electrical connections or shows active current leakage, replacement is the safer path forward.
Repair and Component Replacement
Once corrosion damage has been assessed, select the appropriate repair approach based on severity. For superficial surface oxidation on aluminum frames, use a non-abrasive brush with isopropyl alcohol to remove loose corrosion, then apply a thin coat of zinc-rich primer or clear anodizing sealant to restore protection. Corroded electrical connections require complete disassembly: disconnect cables, wire-brush terminals until bare metal appears, apply dielectric grease, and reconnect with proper torque. If junction box internals show rust or moisture damage, junction box repair may involve replacing the entire housing and bypass diodes rather than attempting piecemeal fixes.
For mounting hardware, replace corroded bolts and washers with stainless steel equivalents rated for the environment. Re-seal any compromised frame-to-glass bonds or cable penetrations using silicone rated for continuous UV and temperature cycling. Apply sealant in a continuous bead without gaps, and allow full curing time before re-energizing.
Panel replacement becomes necessary when glass delamination allows moisture deep into the cell layer, when multiple bypass diodes have failed, or when frame corrosion has compromised structural integrity. Calculate replacement cost against remaining warranty value and expected future performance loss. Panels showing micro-crack patterns around corrosion sites, even after surface repair, will continue degrading and should be retired.
Testing and Verification
After completing repairs, verify the system’s safety and performance before returning it to service. Start with a visual inspection of all work areas, confirming sealants have cured, connections are tight, and no tools or materials remain on the array.
Conduct insulation resistance testing between active conductors and ground using a megohmmeter. Readings should exceed 1 megohm under dry conditions, values below this threshold indicate moisture intrusion or incomplete repair. Test each string individually to isolate any remaining problem circuits.
Measure open-circuit voltage and short-circuit current at the string level, comparing results against manufacturer specifications and pre-corrosion baseline data when available. Voltage readings within 5% of expected values generally indicate proper electrical function. Use thermal imaging during initial operation to detect hot spots at repaired connections or junction boxes, which signal high resistance and incomplete remediation.
Monitor system output for 48-72 hours after restart, tracking power production against expected performance based on irradiance conditions. Document all test results for warranty purposes and future maintenance reference.
Prevention Strategies: Building Long-Term Corrosion Resistance
Design and Material Selection
Specifying corrosion-resistant components during the design phase eliminates vulnerabilities before installation begins. Frame material selection forms the foundation of corrosion resistance. Anodized aluminum frames create a protective oxide layer that significantly outlasts bare aluminum, while powder-coated frames add an additional barrier against moisture and salt intrusion. For coastal installations within three miles of saltwater, marine-grade stainless steel (316L) hardware replaces standard zinc-plated fasteners, which corrode rapidly in saline environments.
Grounding system design must isolate dissimilar metals to prevent galvanic corrosion. Copper grounding conductors should never directly contact aluminum frames, use stainless steel bonding washers or aluminum-to-copper transition lugs with dielectric grease. Select modules with double-sealed junction boxes featuring silicone gaskets rather than foam seals, which degrade under UV exposure.
Encapsulation quality directly determines moisture ingress resistance. Specify modules using cross-linked ethylene vinyl acetate (EVA) or polyolefin encapsulants with hydrolysis-resistant formulations. Backsheet materials should meet IEC 61730 standards for moisture barrier performance, with fluoropolymer or glass-glass constructions offering superior protection in high-humidity climates.
Electrical connectors warrant equal attention. MC4-compatible connectors with gold-plated contacts resist oxidation better than tin-plated alternatives. Verify all components carry appropriate IP ratings (minimum IP67 for junction boxes) to ensure environmental protection matches site exposure conditions. Investing in premium materials upfront typically costs 3-5% more but can extend system life by a decade while eliminating expensive mid-life replacements.
Installation Best Practices
Proper installation techniques form the first line of defense against premature corrosion. Start with torque specifications: overtightening mounting bolts crushes protective coatings and creates stress points where moisture infiltrates, while undertightening allows movement that abrades protective layers. Use a calibrated torque wrench and follow manufacturer values, typically 10-15 Nm for frame clamps and 4-6 Nm for grounding lugs.
Implement dielectric isolation wherever dissimilar metals meet. Place stainless steel washers between aluminum frames and steel mounting rails, or use specialized isolation kits with non-conductive spacers. This breaks the galvanic circuit that drives accelerated corrosion between materials with different electrode potentials.
Apply marine-grade silicone or polyurethane sealant to all penetrations, cable entries, and frame joints. Create a continuous bead without gaps, and tool it smooth to prevent water pooling. For coastal installations, use sealants rated for UV and salt exposure.
Design drainage pathways that prevent water accumulation. Orient mounting rails to shed water away from electrical components, avoid creating pockets where moisture collects, and ensure junction boxes face downward or sideways rather than upward. Never mix aluminum hardware with galvanized steel fasteners, choose all-aluminum or all-stainless steel hardware systems matched to your specific environmental conditions.
Scheduled Maintenance and Monitoring
A structured maintenance schedule is your most effective defense against corrosion progression. Conduct visual inspections quarterly in moderate climates, monthly in coastal or high-humidity environments. During each inspection, examine junction boxes for moisture ingress, check frame-to-mounting hardware connections for white powdery deposits (aluminum oxide), and test torque on electrical terminals. Clean panels biannually using deionized water to remove salt residues and pollutants that accelerate electrochemical reactions. Annual thermographic surveys identify hot spots indicating corroded connections before visible symptoms appear. Document all findings with dated photographs and resistance measurements to track degradation rates over time. Integrate these corrosion-specific checks into your broader O&M program by following proven solar PV maintenance tips that address system-wide performance optimization. Mose Solar’s educational program trains PV professionals in these maintenance protocols, combining university research on degradation mechanisms with field-tested inspection techniques for early corrosion detection.
Understanding Corrosion Mechanisms in PV Systems
Solar panel corrosion is fundamentally an electrochemical process where metal components lose electrons and deteriorate when exposed to moisture and oxygen. Understanding these mechanisms helps PV professionals diagnose problems accurately and implement targeted prevention strategies.
The basic corrosion process requires three elements: an anode (where metal oxidation occurs), a cathode (where reduction reactions happen), and an electrolyte (typically moisture containing dissolved salts or pollutants) that conducts ions between them. When these components exist simultaneously in a solar panel system, electrons flow from the anode through the metal structure to the cathode, gradually degrading the anodic material.
- Galvanic Corrosion
- Accelerated corrosion that occurs when two dissimilar metals in electrical contact are exposed to an electrolyte, causing the more reactive metal to corrode preferentially. This commonly affects aluminum frames connected to stainless steel mounting hardware.
- Potential-Induced Degradation (PID)
- A leakage current phenomenon where high system voltage drives ion migration through the encapsulant, causing sodium accumulation at cell surfaces and reducing panel power output. PID represents an electrical rather than purely chemical corrosion mechanism.
- Electrochemical Cell
- The complete system of anode, cathode, electrolyte, and conductive path that enables corrosion reactions. In solar panels, moisture condensation or rain creates temporary electrochemical cells across metal components.
- Passivation
- The formation of a protective oxide layer on metal surfaces that slows or prevents further corrosion. Aluminum frames naturally develop passive layers, but damage from abrasion or chemical exposure compromises this protection.
In coastal or industrial environments, chloride and sulfur compounds in airborne moisture significantly accelerate corrosion rates by breaking down passive layers and increasing electrolyte conductivity. These aggressive ions penetrate seal failures, damaged encapsulation, or delamination sites, establishing localized corrosion cells that spread over time.
Temperature cycling compounds the problem through repeated expansion and contraction, creating micro-cracks in protective coatings and sealants. These pathways allow moisture ingress while mechanical stress maintains electrical contact between corroding components. The result is progressive material loss that manifests as the visible symptoms and performance degradation covered in earlier sections of this article.
Frequently Asked Questions
Solar panel corrosion raises several practical questions for system owners and operators. Here are answers to the most common concerns we hear from installers and maintenance professionals.
Does my solar panel warranty cover corrosion damage?
Standard manufacturer warranties typically cover defects in materials and workmanship but exclude corrosion resulting from improper installation, inadequate maintenance, or exposure to corrosive environments beyond normal operating conditions. Review your warranty terms carefully, as some manufacturers offer enhanced corrosion protection warranties for coastal or industrial installations.
How much does corrosion reduce my solar panel lifespan?
Well-maintained panels in low-corrosion environments typically last 25-30 years with minimal degradation. Unchecked corrosion can reduce this to 15-20 years or less, with accelerated power loss rates of 1-2% annually instead of the normal 0.5% degradation rate.
Can I fix solar panel corrosion myself or should I hire a professional?
Minor surface corrosion on frames and mounting hardware can be addressed by experienced DIY installers with proper safety equipment and electrical knowledge. Junction box corrosion, internal moisture ingress, or extensive damage requires professional assessment and repair to maintain system safety and warranty coverage.
How often should I inspect my solar panels for corrosion?
In moderate climates, annual inspections are sufficient for residential systems. Coastal installations, industrial sites, or areas with high humidity should be inspected every six months, with particular attention to electrical connections and frame integrity during routine cleaning.
Understanding when to escalate corrosion issues is crucial for protecting your investment. If you notice rapid power degradation (more than 5% in a single year), visible arcing or burn marks near connections, or widespread frame deterioration across multiple panels, immediate professional evaluation is warranted. These symptoms indicate conditions that could compromise system safety or lead to complete panel failure.
The cost of addressing corrosion varies dramatically based on detection timing. Early intervention, cleaning surface oxidation and resealing minor penetrations, might cost a few hundred dollars for a residential system. Delayed action requiring junction box replacements or full panel swaps can run into thousands of dollars, not counting production losses during downtime. This cost differential underscores why incorporating corrosion checks into regular maintenance schedules delivers strong returns.
For operators managing commercial or utility-scale installations, establishing clear corrosion assessment protocols as part of your operations and maintenance program prevents small issues from becoming portfolio-wide problems. Many asset managers now include thermal imaging and electrical testing specifically targeting corrosion indicators during semiannual site visits, catching deterioration before it impacts financial performance.
Key Takeaways: Protecting Your Solar Investment
Solar panel corrosion is not an inevitable outcome but a preventable and manageable challenge. The difference between a system that delivers its projected returns and one that underperforms often comes down to how quickly you identify the early warning signs. Discoloration around junction boxes, white powdery residue on aluminum frames, and unexplained power drops all signal corrosion processes that accelerate if left unchecked.
Your first line of defense is systematic inspection. Quarterly visual checks combined with annual thermal imaging detect corrosion pathways before they compromise panel integrity. When you spot damage, prompt action matters. Light surface corrosion responds well to cleaning and protective coatings, while advanced deterioration may require junction box replacement or full panel swap-outs. The cost of early intervention is always lower than deferred repair.
Prevention strategies pay dividends throughout system life. Choose anodized or powder-coated frames for humid and coastal environments. Specify stainless steel or hot-dip galvanized mounting hardware. Apply dielectric isolation techniques wherever dissimilar metals meet. Ensure proper drainage to prevent standing water. These design and installation choices create multiple barriers against electrochemical degradation.
Integrate corrosion assessment into your maintenance schedule rather than treating it as a separate concern. Document findings with photos and electrical measurements to track trends over time. This data-driven approach lets you shift from reactive repairs to predictive maintenance, catching problems at the stage where a $50 sealant application prevents a $500 component replacement.
Corrosion management is not optional for maximizing solar ROI. It is foundational to protecting the performance, safety, and financial returns your PV system was designed to deliver.
Effective corrosion management protects both your immediate investment and long-term energy returns. The troubleshooting framework presented here, from symptom recognition through systematic repair and prevention, equips system owners and operators to address corrosion before it compromises performance. Early intervention during the inspection phase prevents minor surface oxidation from escalating into junction box failure or laminate delamination that necessitates costly panel replacement.
Your prevention strategy matters more than reactive repairs. Material selection, proper installation techniques, and scheduled maintenance collectively determine whether your array delivers projected output for 25 years or experiences accelerated degradation. Coastal installations, high-humidity environments, and sites with temperature extremes require heightened vigilance and corrosion-resistant specifications from day one.
The solar industry needs professionals who understand these electrochemical processes and prevention protocols. Mose Solar collaborates with universities to develop educational programs that prepare the next generation of PV technicians and engineers with hands-on corrosion management expertise. These partnerships ensure future practitioners can design resilient systems and implement maintenance protocols that maximize solar asset performance.
Protecting your solar investment requires technical knowledge, consistent monitoring, and proven prevention methods working together across your system’s operational lifetime.